iDrive Fulfillments User Guide -
Table of Contents
Notice
Please read this User Guide before using this product and retain it for future reference. It contains a useful information that can help determine why the product may not work as expected.
Application Interface
Dashboard
Integration Management Dashboard. Manage all your applications within a single dashboard. Easy-to-read user interface. Monitor connection statuses and activity. Identify, correct, and reprocess data errors. Schedule and initiate connector features, such as flows and triggers.
Administrative or Developer type permissions are required for the NetSuite user to access IDC Dashboards and integration configurations
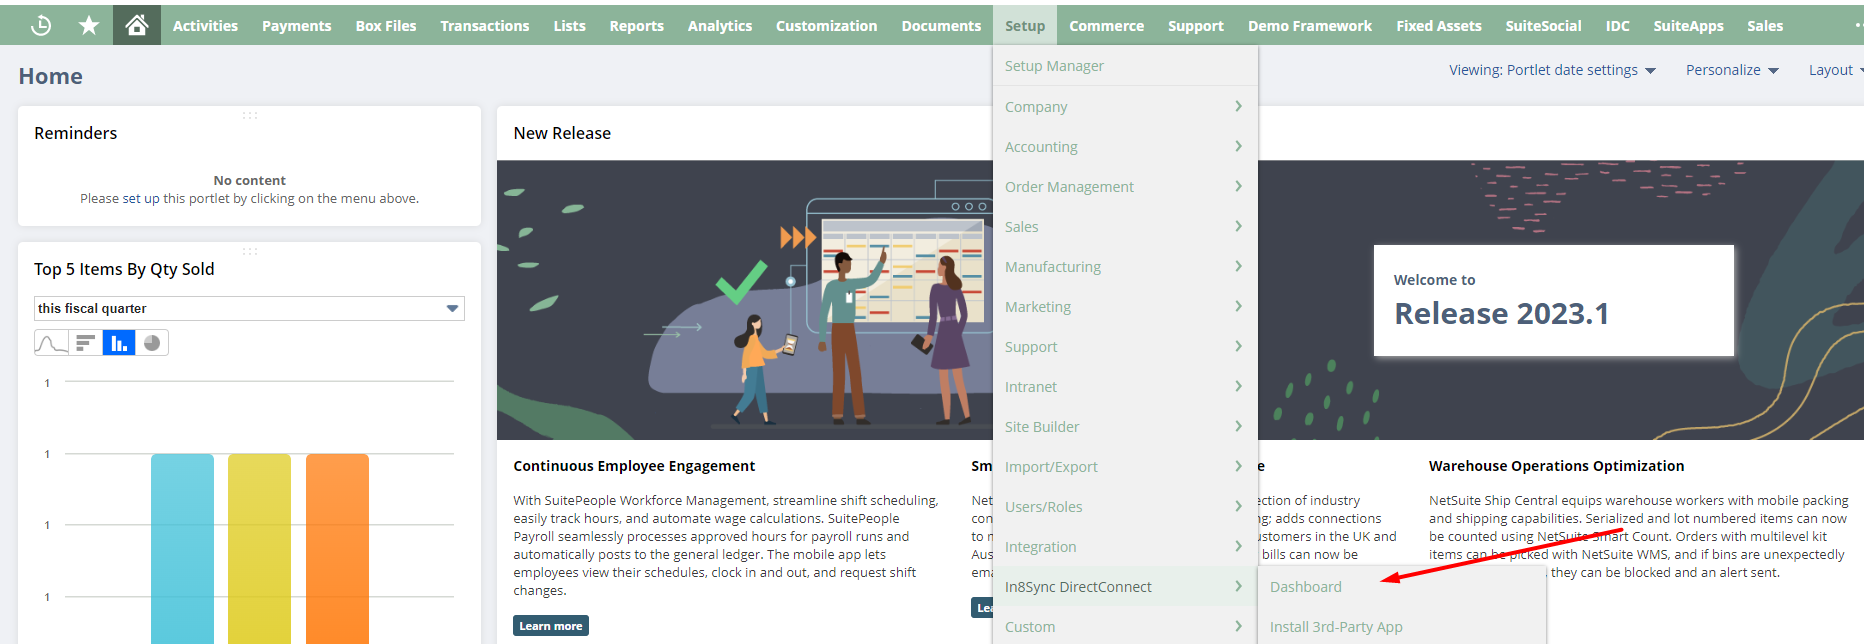
There are two ways to access the IDC dashboard, navigate in NetSuite:
IDC → Management Tools → Dashboard

Setup → In8sync DirectConnect → Dashboard
IDC Menus
Return to NetSuite Dashboard
Clicking the home icon or the ‘Return to NetSuite Dashboard’ takes you back to your NetSuite Dashboard.

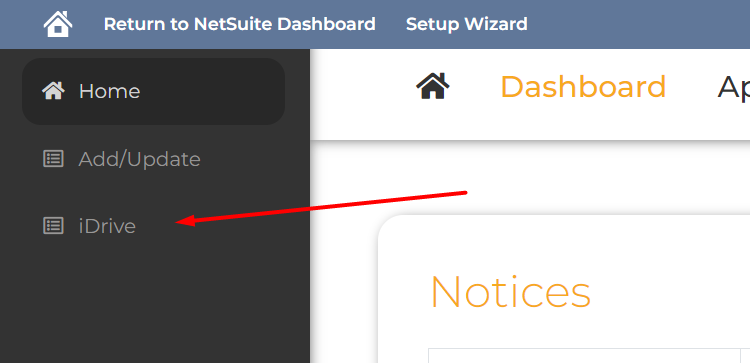
Left Menu
This menu shows your currently installed applications. Clicking on an application in this menu will take you to the management dashboard for that particular application.
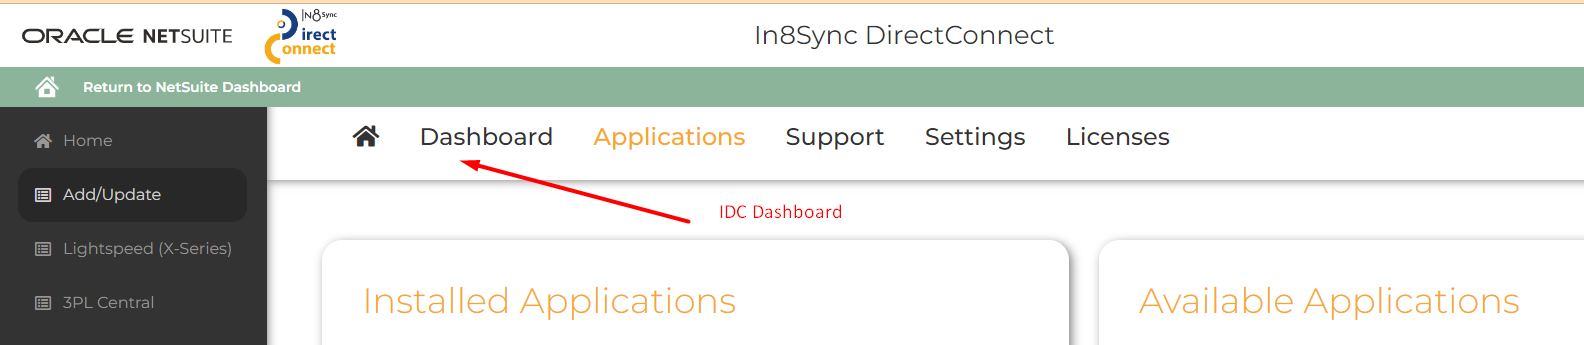
Clicking the ‘Add/Update’ button from this menu takes you to the ‘Applications’ page where you can see a list of applications we have available to license and install in your account.
Clicking the ‘Home button’ from this menu will bring you back to your main dashboard page.
Notices
Here you can view new messages, mark them as read and see a list of archived messages?

Activity
In the activity section you will see any installed applications that are currently showing errors. You can see the data flows where the errors are occurring and the amount of errors in that flow.
When you click on the errors (highlighted in blue) it takes you to the Logs page of that particular application where you can view the errors in more detail, test and resolve any issues.
When you click the pencil icon above the errors it will take you to the Management Dashboard for that particular application.

Menu Items
Application Menu
Select iDrive from left menu of installed applications
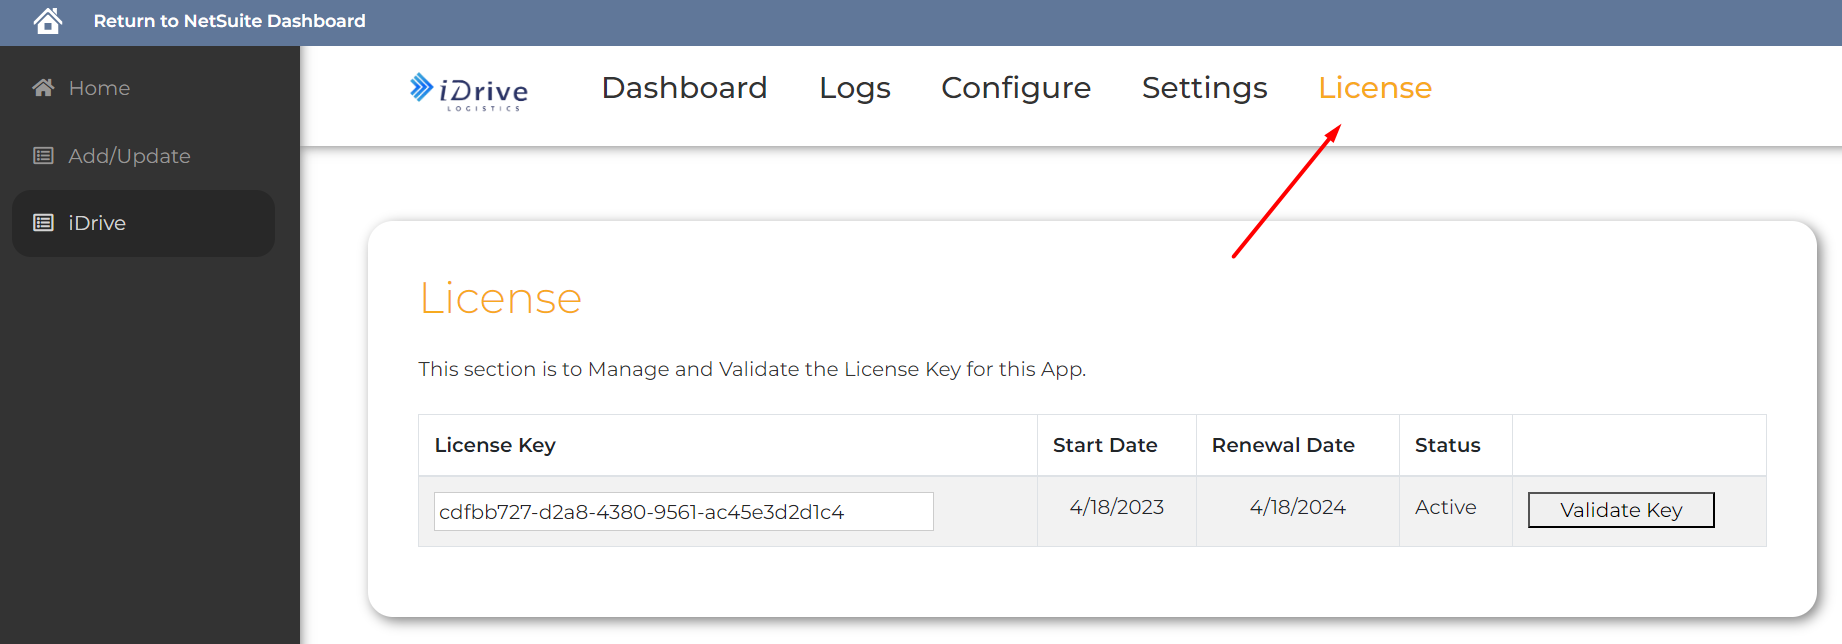
License
The application must have a valid license key to function. Reach out to your In8Sync rep to update or get a license key
Settings
Configure iDrive API key from the Settings page

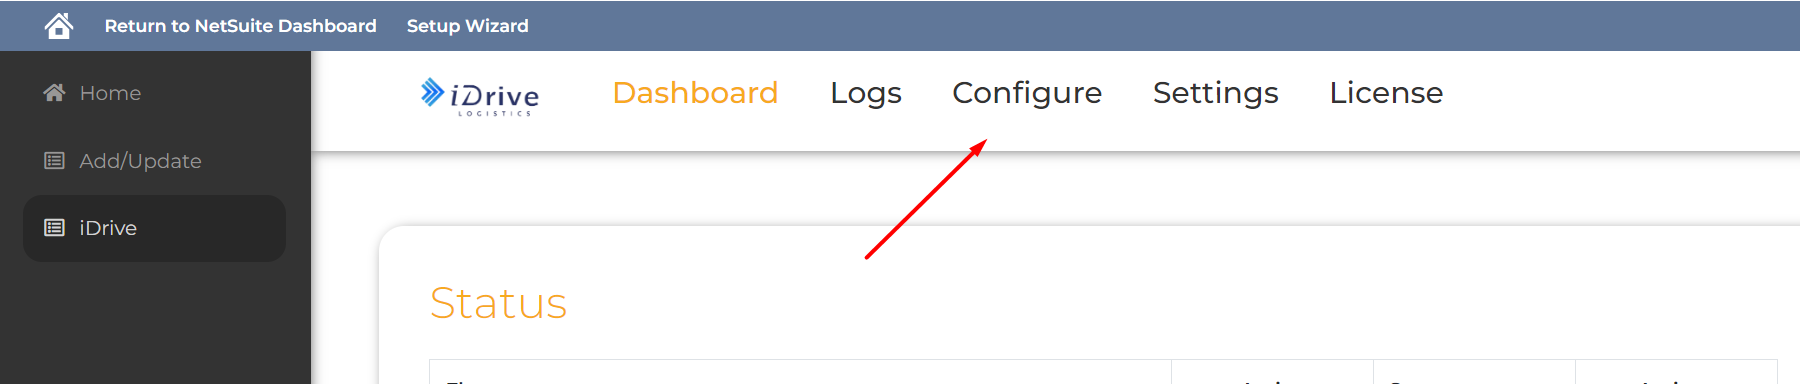
Configure
Configure specific integration flows from the configure page
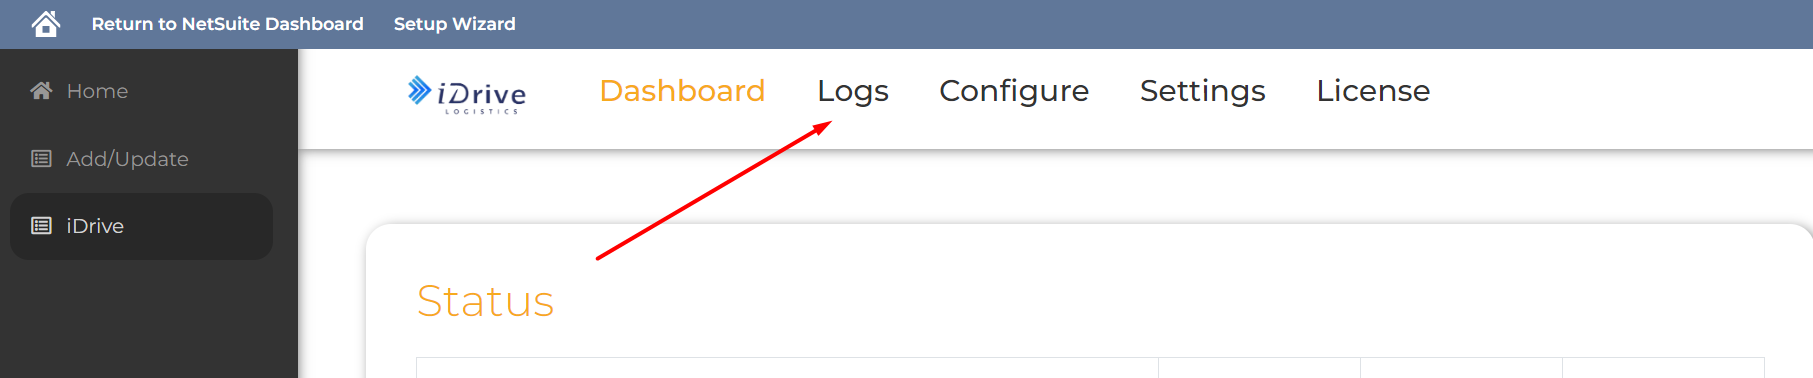
Logs
See the integration results from the Logs page and manage errors
Configuring the application
Settings
Receive iDrive API credentials and endpoint URLS from your iDrive contact
Add Endpoint URLs to settings
Production account URL
Test account URL
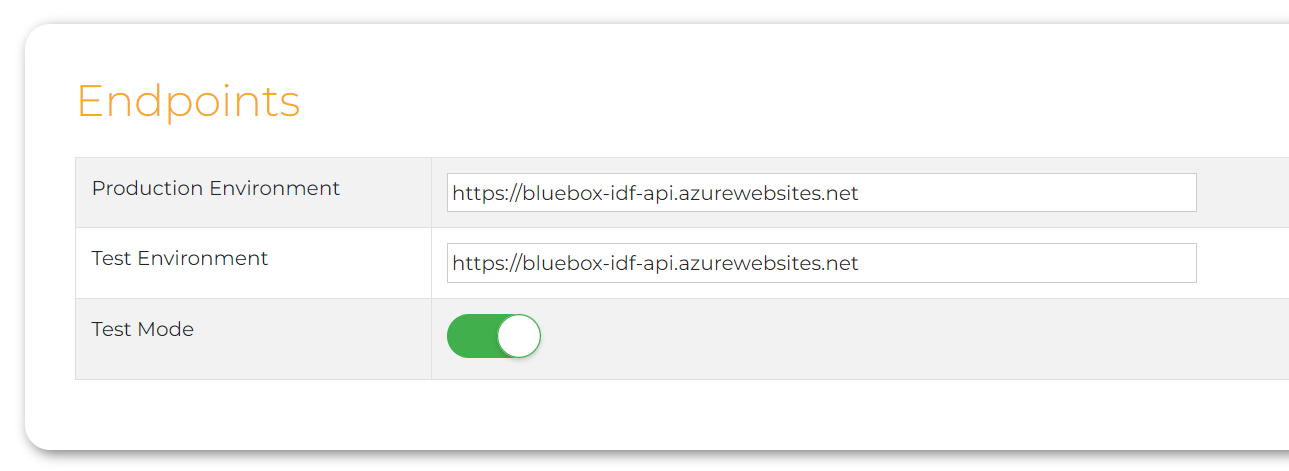
Add iDrive Credentials

Configure Integration Flows
From the configure page you can adjust each available flow to your specific mappings and conditions
These flows come with default conditions and mappings. You may choose to override these configurations
Export Flows Triggers
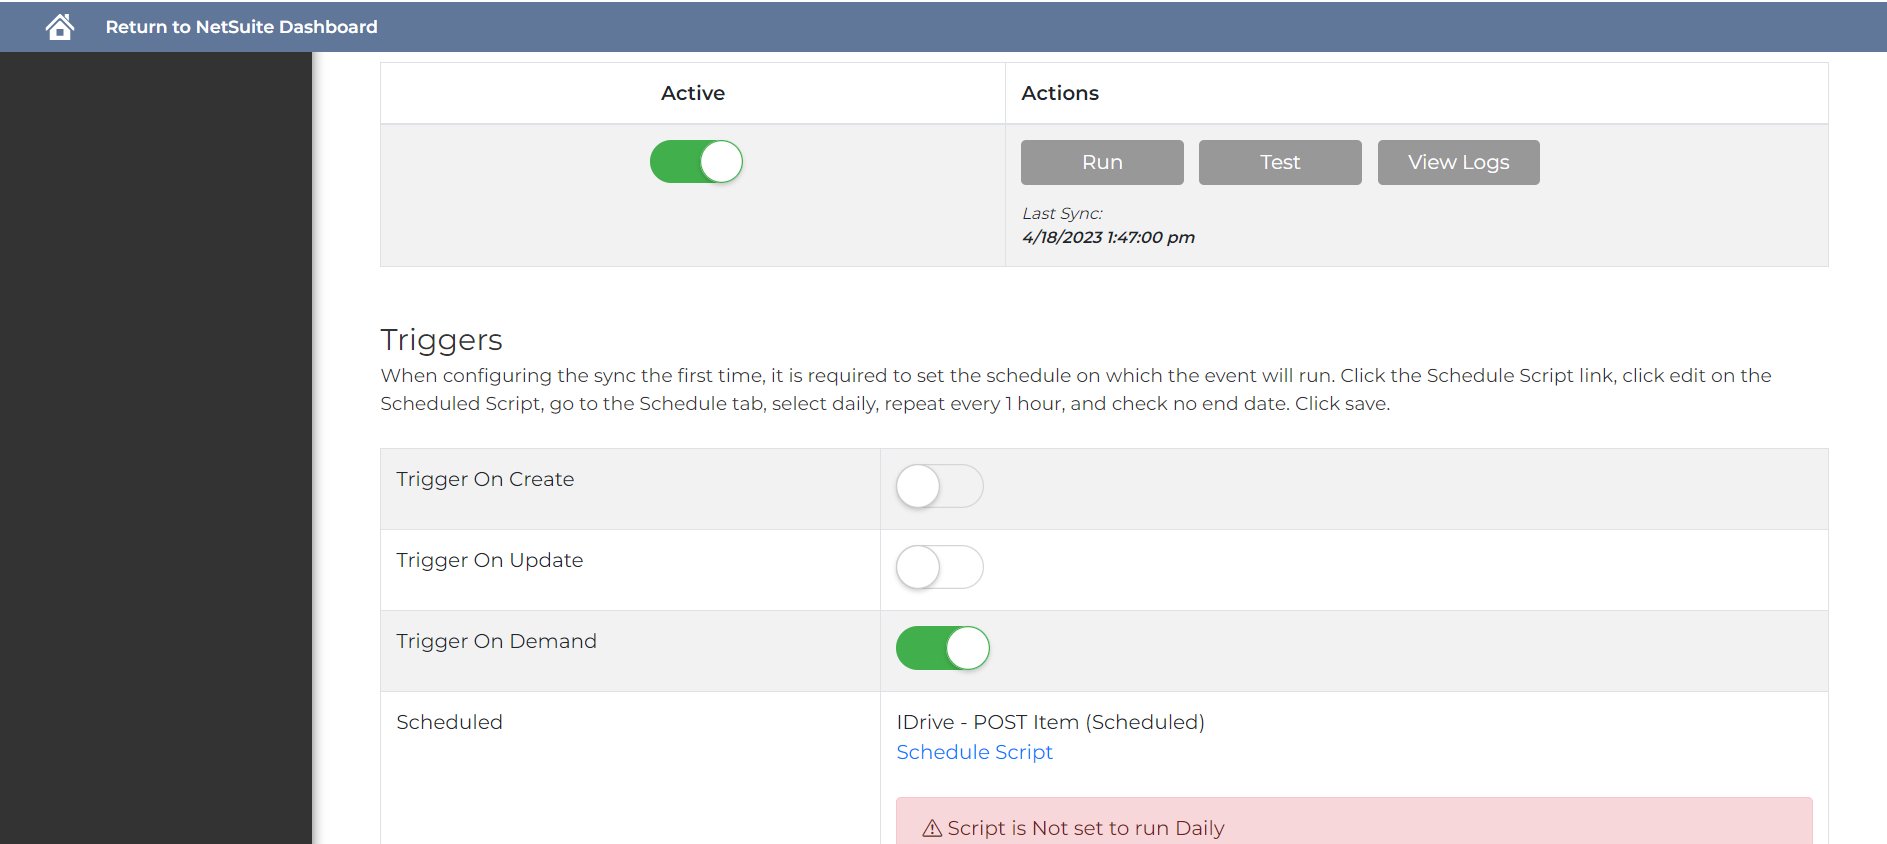
Active Toggle
All flows require the toggle to be active in order to run
Export flows have three options to trigger a record to sync to iDrive
On Demand
This adds a button to the NetSuite record that you can click and select to sync that record to iDrive
This is typically used for testing, as it requires manual steps in the NetSuite UI
When you click the button on the record to sync and you do not see the flow to export the record, check the Conditions setting on the Configuration page for that flow.
On Create
This auto syncs the record to iDrive when it is created in NetSuite
Typically used for a near real-time automated sync
It is recommended to only enable this after testing and you are ready to automate the flow
On Update
This auto syncs the record upon edit and save
Typically used for a near real-time automated sync
It is recommended to only enable this after testing and you are ready to automate the flow
Scheduled
This auto sync multiple records from a saved search at a regular interval
It is recommended to only enable this after testing and you are ready to automate the flow
It is not recommended to enable this along with On Create or on Edit
Import Flow Scheduling
Import flows always run on a schedule. They can run as often as every 15 minutes.
These Import flows can also be ran manually by clicking the ‘Run’ button on the configuration page.
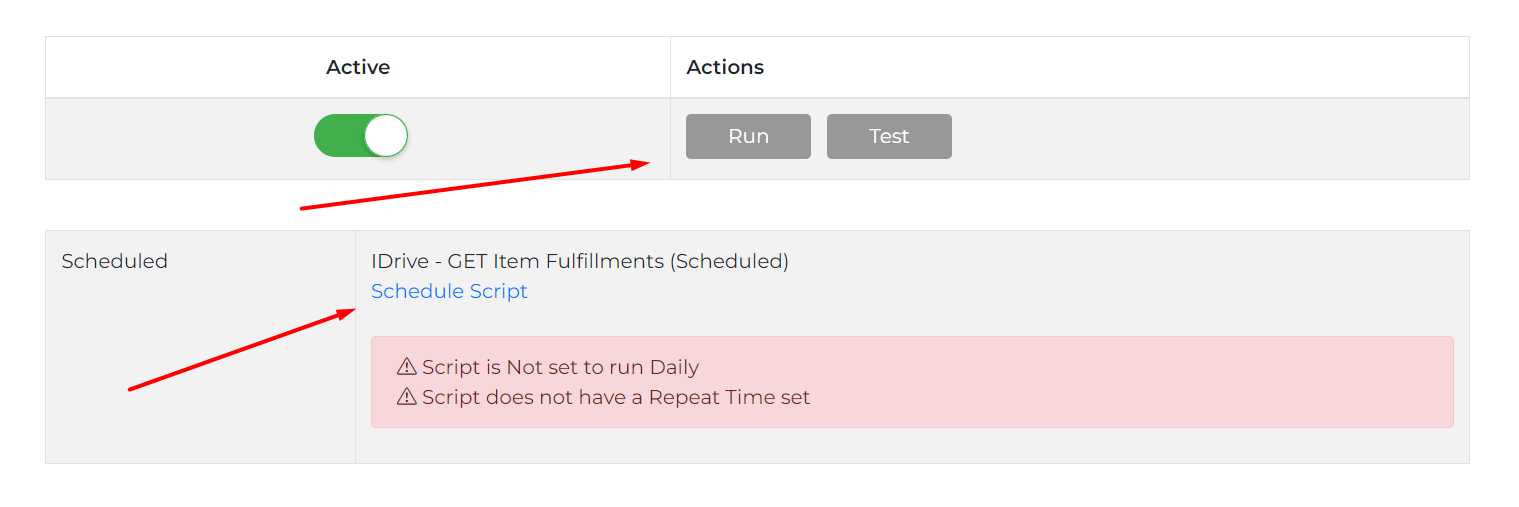
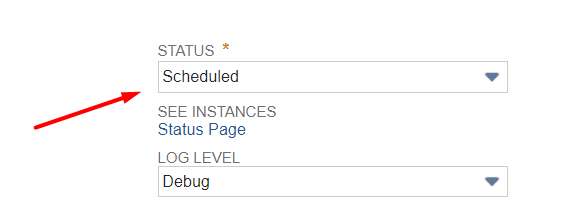
When scheduling a flow to run
Click on the link ‘Schedule Script’ - This will open the scheduled script Deployment in a new tab.
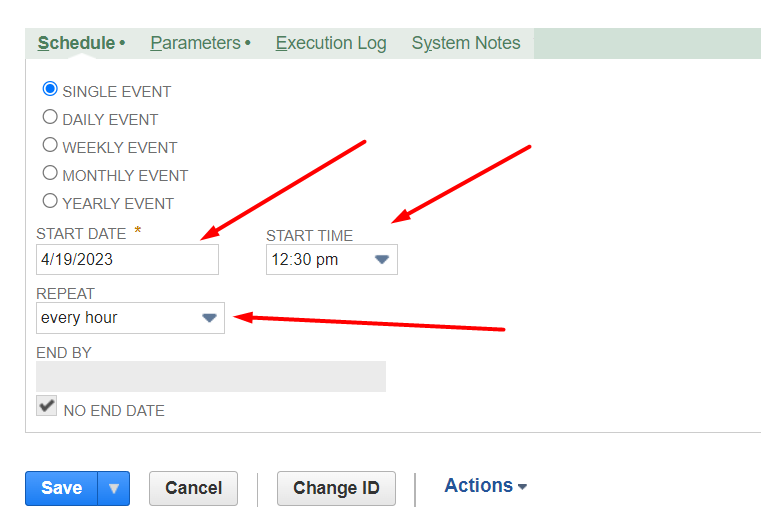
Edit the deployment
Go to the schedule section below
Set Start Date, Time & Frequency
Set status in the uppoer right corner of the page to Scheduled
Click save
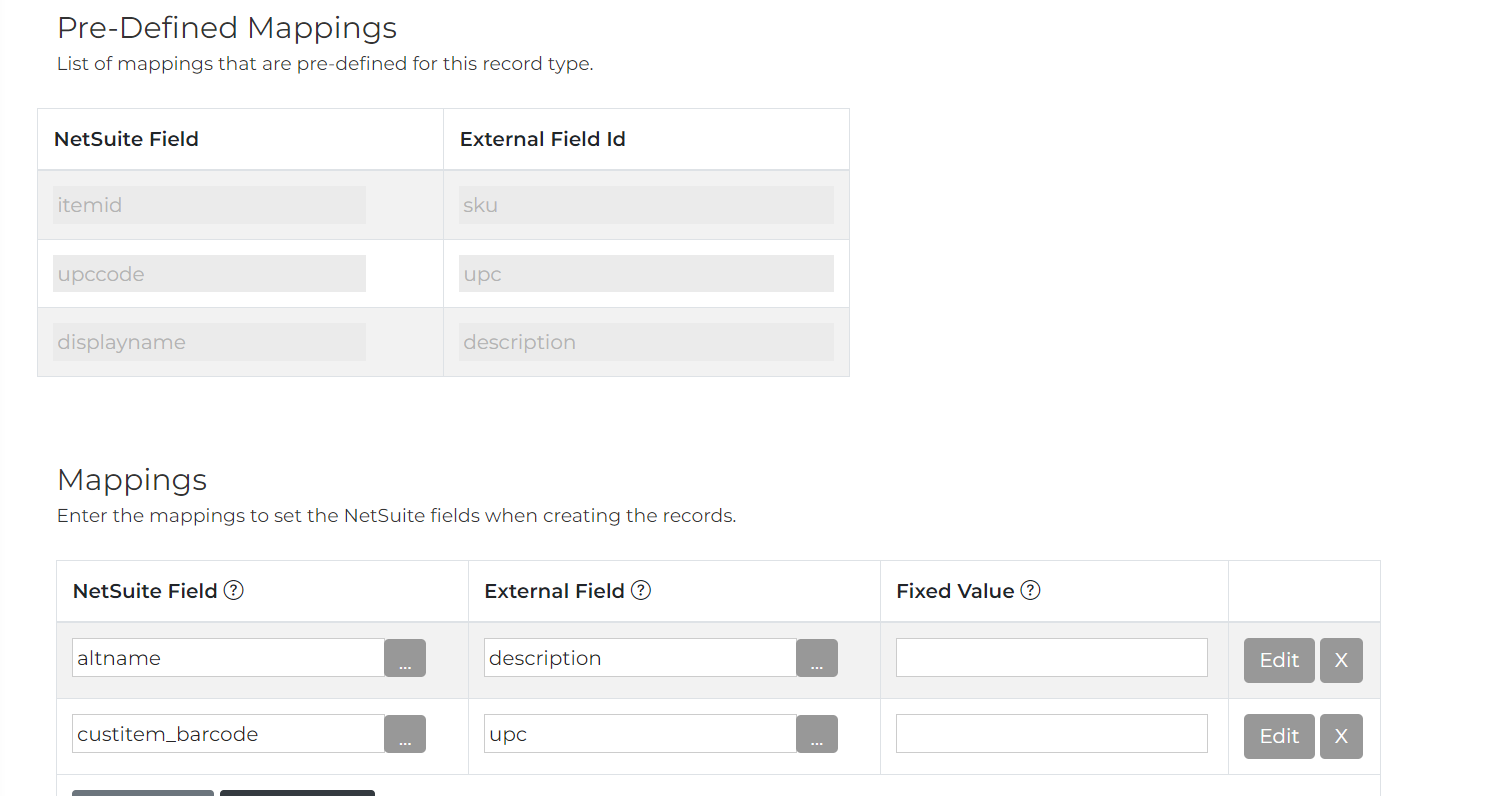
Export Items
Items are pre-mapped to send the required fields to iDrive. If you have alternate fields you want to send you can override any pre-defined mappings the standard mappings table
Testing Item Flow
On the IDC configuration page
Make sure the sync is Active and the On Demand function is enabled
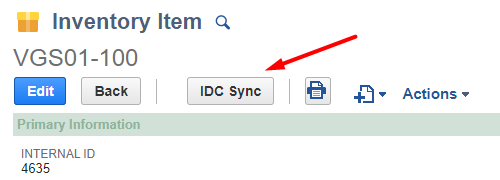
Go the item record
Click ‘IDC SYNC’ button at the top of the page
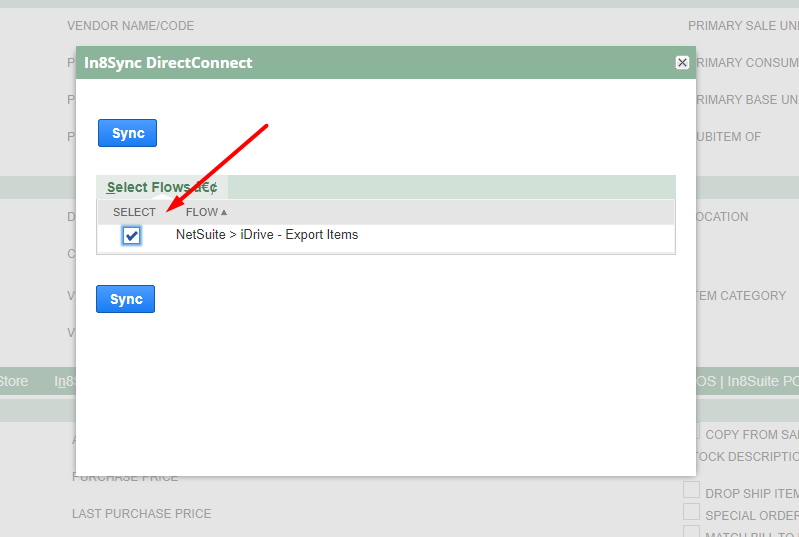
In the Modal pop-up
Select the flow to test and click ‘Sync’ - waiting 5-10 seconds for results
Delete Items
On the IDC configuration page
Make sure the sync is Active
Delete Items merely needs to be active to work. It works in conjunction with the Export Items flow
There is a checkbox on the item record under the IDC tab that will qualify that item to be deleted from iDrive

Testing Delete Item Flow
Go the the item record, click edit
Go to the IDC tab and check the 'Delete from iDrive checkbox, click save on the item
Click ‘IDC SYNC’ button at the top of the page
In the Modal pop-up
Select the flow to test and click ‘Sync’ - waiting 5-10 seconds for results
Export Sales Orders
On the IDC configuration page
Make sure the sync is Active and the On Demand function is enabled
Go the record you want to test
Click ‘IDC SYNC’ button at the top of the page

In the Modal pop-up
Select the flow to test and click ‘Sync’ - waiting 5-10 seconds for results
Export Purchase Orders
On the IDC configuration page
Make sure the sync is Active and the On Demand function is enabled
Go the record you want to test
Click ‘IDC SYNC’ button at the top of the page

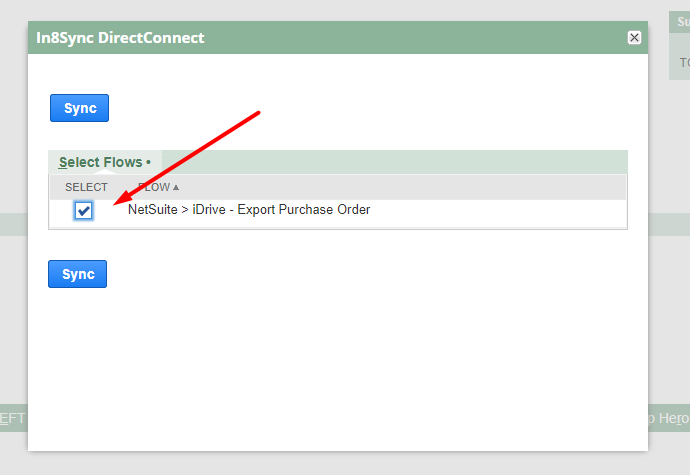
In the Modal pop-up
Select the flow to test and click ‘Sync’ - waiting 5-10 seconds for results
Export Outbound Transfer Orders
On the IDC configuration page
Make sure the sync is Active and the On Demand function is enabled
In the Conditions
Set the location with the internalid of the iDrive warehouse or warehouses

Go the record you want to test
Click ‘IDC SYNC’ button at the top of the page

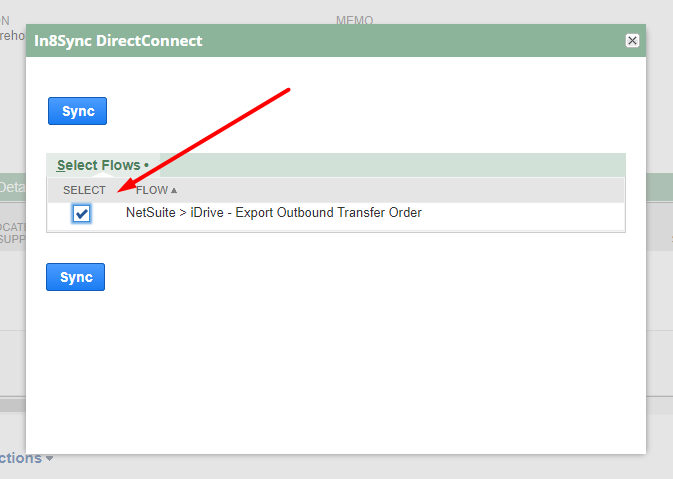
In the Modal pop-up
Select the flow to test and click ‘Sync’ - waiting 5-10 seconds for results
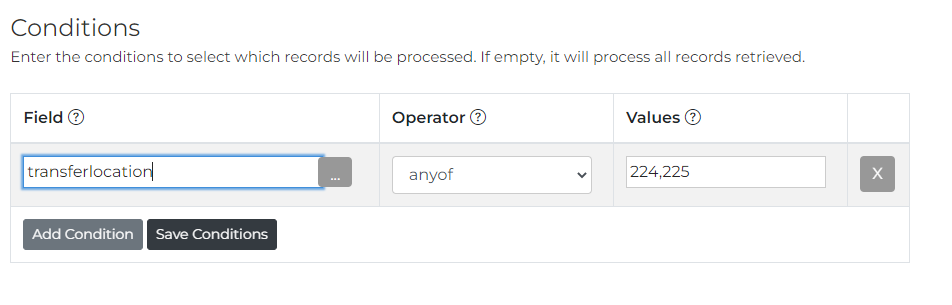
Export Inbound Transfer Orders
On the IDC configuration page
Make sure the sync is Active and the On Demand function is enabled
In the Conditions
Set the transferlocation with the internalid of the iDrive warehouse or warehouses
Go the record you want to test
Click ‘IDC SYNC’ button at the top of the page


In the Modal pop-up
Select the flow to test and click ‘Sync’ - waiting 5-10 seconds for results
Export Return Authorizations
Return Authorizations must be generated from a Sales Order that had synced to the 3PL and shipped from the 3PL
On the IDC configuration page
Make sure the sync is Active and the On Demand function is enabled
Go the record you want to test
Click ‘IDC SYNC’ button at the top of the page

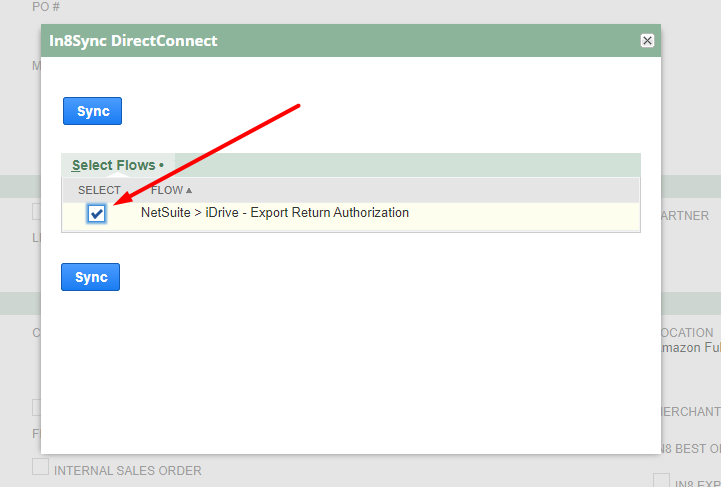
In the Modal pop-up
Select the flow to test and click ‘Sync’ - waiting 5-10 seconds for results
Import Item Fulfillments
Item fulfillments will only get created for Sales Orders and Outbound Transfer Orders synced to the 3PL
On the IDC configuration page
Make sure the sync is Active and the On Demand function is enabled
Click the ‘RUN’ button at the top of the page
Import Item Receipts
Item receipts will only get created for Purchase Orders and Inbound Transfer Orders synced to the 3PL
On the IDC configuration page
Make sure the sync is Active and the On Demand function is enabled
Click the ‘RUN’ button at the top of the page
Import Return Receipts
Return receipts will only get created for Return Authorizations synced to the 3PL and received by the 3PL
On the IDC configuration page
Make sure the sync is Active
Click the ‘RUN’ button at the top of the page
Import Vendor Bill
Coming Soon
Import Inventory Variance Report and Adjustments
Coming Soon
Contacting Support
Open a Support Case HERE
In8Sync Contact Phone Number
+1 (888) 604- 4120 Ext. 3
©Copyright 2023 In8Sync, LLC | All Rights Reserved