Zapier Setup Guide
Zapier Setup Guide
Table of Contents
Table of Contents
Prerequisites
Requirements | Required |
|---|---|
NetSuite Requirements | |
Hardware / Devices | No specific requirements. NetSuite works on most devices. If a problem occurs contact NetSuite Support. |
Operating System | NetSuite will function on Windows, macOS, Linux, etc. |
Web Browser | Netsuite works on most common web browsers like Google Chrome, Mozilla Firefox, Microsoft Edge, or Safari. |
Mobile App | Netsuite provides a mobile app for iOS and Android. |
Internet Connection | A stable and reliable connection is required. |
Database | Netsuite provides the database architecture required for SuiteBundles. |
User Licensing and Roles | NetSuite offers different licensing tiers based on user count. Please ensure your functionality requirements are taken into consideration. |
Storage and Data Limits | Storage is based on Subscription. Please ensure your storage demands are met. |
In8Sync Requirements | |
License Key | Contact In8Sync Team to get a valid license key. |
Zapier Role | There is a role called ‘Zapier’ which was already included in the bundle. |
Access Token | To connect with Zapier, it requires a Token Id and Token Secret to be generated. A service from Zapier server deploys the application to the NetSuite account using Token Based Authentication. Go to menu Setup > Users/Roles > Manage Users. Find the Employee record that will be used, edit and go to the Access tab. Add the "Zapier" role and save it. Go to menu Setup > Users/Roles > Access Tokens. Create a new Access Token, select the Application Name = "Zapier", User = user with the Zapier role, Role = "Zapier", and save it. It will generate a Token id and Secret that need to be entered on Zapier. |
SuiteBundle Installation
To begin integrating NetSuite with Zapier and unlock seamless connectivity with hundreds of compatible apps, you need to add the NetSuite connector in your Zapier account. You'll also need to install a NetSuite bundle that empowers the functionality within your NetSuite account. Please ensure you have the necessary permissions to install NetSuite bundles.
In NetSuite, go to Customization > SuiteBundler > Search & Install Bundles.
Search for "In8Sync Zapier" (Id 333093) and click on the bundle details.
Once the bundle is installed, go to menu Setup > In8Sync Zapier > License Key.
On the opened page, enter the Key, accept the terms and click to Submit to validate your license key.
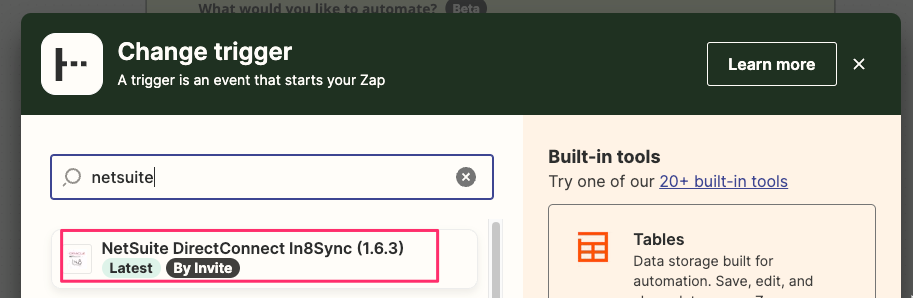
Use the below link to add the NetSuite connector to your Zapier account:
https://zapier.com/developer/public-invite/5007/afe873128261fccdfeed2e50d25bc67a/
Once accepted, if the connector does not show in the list of available apps, press CTRL+F5 (Windows) or CMD+SHIFT+R (Mac) to do a hard refresh in the browser.
Select NetSuite DirectConnect In8Sync latest version.
Authentication
To establish authentication, we must set up token-based authentication. Please follow these steps:
In NetSuite, edit the 'Zapier' role (included in the bundle) and then save it with another name (ie: Zapier Custom). Add all the necessary permissions required for the integration.
Next, edit the employee record. Navigate to the 'Access' tab and add the role you created earlier.
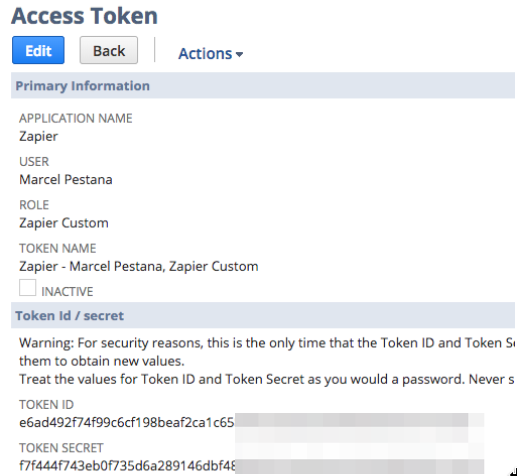
Create an Access token. Select the application 'Zapier,' the user to whom you added the role, and the newly created role.
Note that NetSuite will display the token only once, so ensure you store it securely.
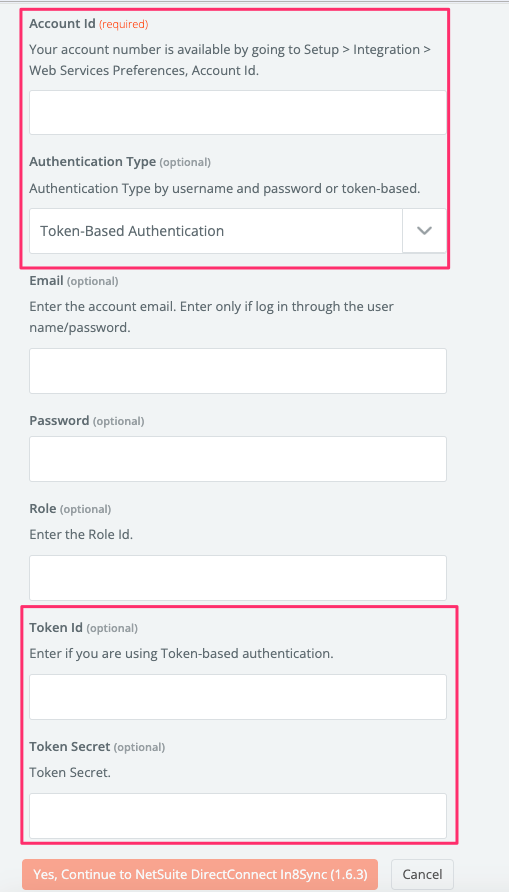
In Zapier, enter the Account Id, Token ID and Token secret on the authentication page. Be sure to remove any extra spaces from the Token ID and Secret.
If the page shows the email, password and role, please ignore those fields. Select Token Based authentication and only enter the Account Id, Token Id and Token Secret.
Remember to add all the required permissions for this integration to avoid encountering the 'Insufficient permission' error."
Updating the Zapier Bundle
The In8Sync Zapier Bundle can be updated at any time. You will notice an indicator next to the Bundle Version when a new version has been released:
Navigate to Customization > SuiteBundler > Search & Install Bundles > List.
Find the Bundle by its name, Hover over the Green Edit Icon, then click on 'Update.'
On the next page that loads, confirm the update by clicking on 'Update Bundle'.
Uninstalling the Zapier Bundle
To uninstall the Bundle, please follow the instructions below:
Navigate to Customization > SuiteBundler > Search & Install Bundles > List
Find the Bundle by its name, Hover over the Green Edit Icon, then click on 'Uninstall'.
On the next page that loads, it will display the status of the uninstallation process for the In8Sync Bundle.